Render
Run OpenClaw on Render with the open-source ControlClaw firewall as its proxy. Two web services on one private network, and every request OpenClaw makes in the firewall's log.
On Render the firewall is OpenClaw's proxy, not its only way out. OpenClaw's own requests go through it, get logged and follow its rules. But a shell command or a script that ignores the proxy goes straight to the internet, and OpenClaw can change its own proxy setting. A Render service can't set its own packet filter, so nothing can close that gap here. To make the firewall the only way out, use a plain server or a Compose platform instead.
This guide runs two web services on Render: the ControlClaw firewall and OpenClaw. They talk over Render's private network. The firewall is a service of its own, so later you can point more OpenClaw services at it and see the traffic and rules of all of them in one panel.
What you need
- A Render account. Both services keep their data on a disk, and disks need a paid instance type.
- An API key for OpenClaw's model, such as Anthropic, OpenAI or OpenRouter.
Create both services in the same region: Render's private network only connects services in one region.
Part 1: the firewall
Create the service
Click New, Web Service, choose Existing Image and enter:
ghcr.io/madarco/controlclaw-firewall:0.11.1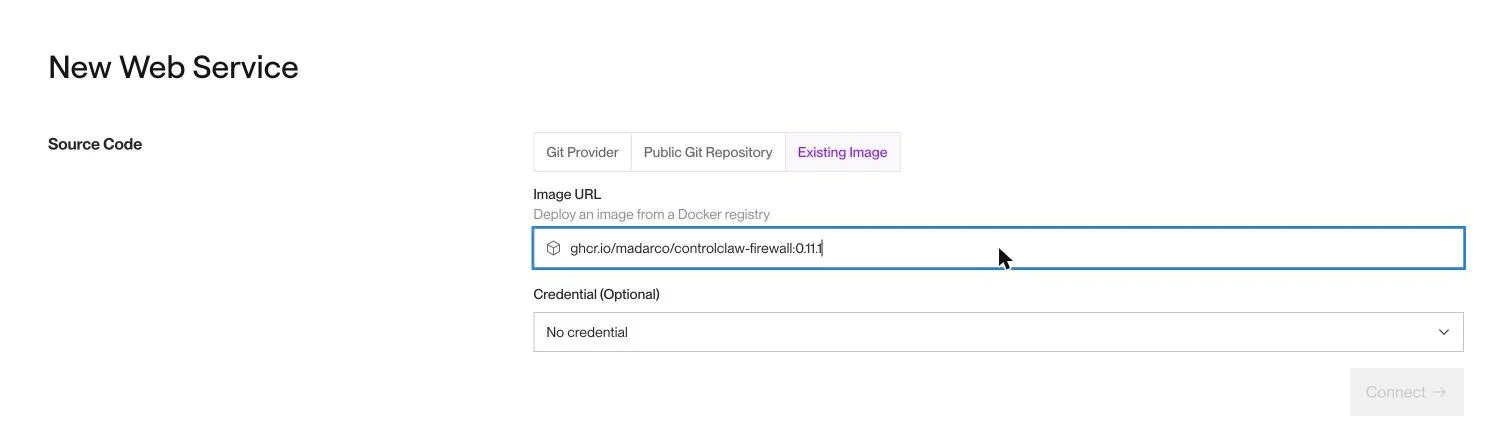
Click Connect. Name the service controlclaw-firewall: OpenClaw finds it by that name. Pick a
paid instance type, such as Starter.
Set the variables
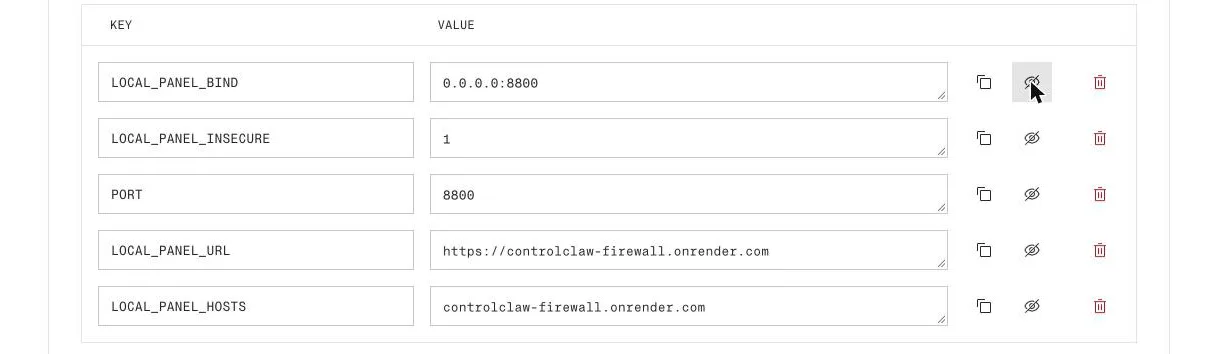
Under Environment Variables, add:
LOCAL_PANEL_BIND=0.0.0.0:8800
LOCAL_PANEL_INSECURE=1
PORT=8800
LOCAL_PANEL_URL=https://controlclaw-firewall.onrender.com
LOCAL_PANEL_HOSTS=controlclaw-firewall.onrender.com
Use your service's own onrender.com address if Render gives it a different one. The panel
listens on port 8800 and answers only under that address. Render sends public traffic to PORT, so
PORT=8800 makes the public address open the panel.
Add a disk
Under Advanced, Disk, add a 1 GB disk mounted on /opt/controlclaw. It keeps the
firewall's certificate authority, its rules and its secrets across deploys.
Set the Docker command
Under Advanced, set Docker Command to:
env -u PORT /sbin/tini -g -- /bin/sh /usr/local/lib/controlclaw/entrypoint.shOne of the firewall's own processes reads PORT too, and fails with EADDRINUSE when it gets
8800. This command starts the firewall without PORT, after Render has used it for routing.
Click Deploy Web Service.
Set the panel's password
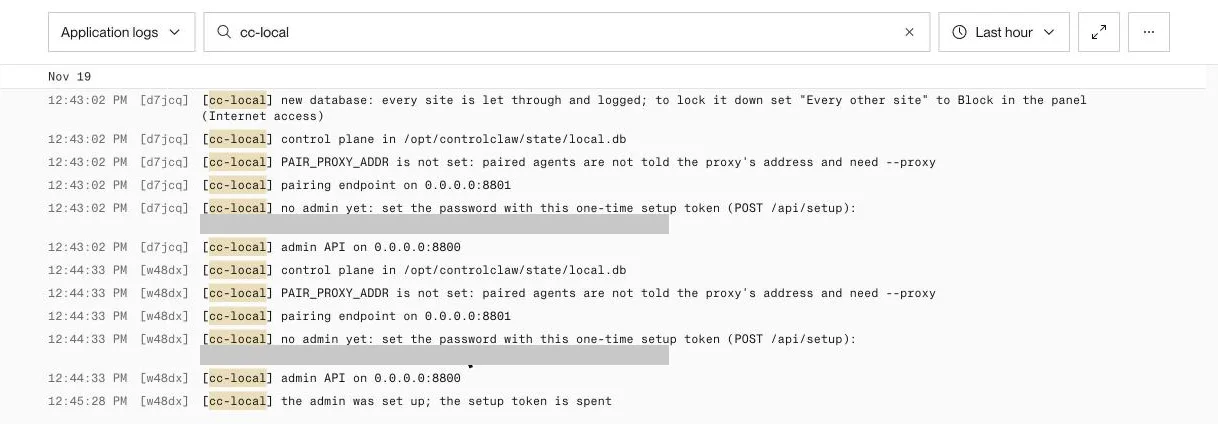
Open Logs and search for no admin yet. Open the service's onrender.com address, paste the
setup token and set the admin password right away: until you do, anyone who can read the log can
set it. The next two steps, a model key and a pairing code, are optional. Skip them.
Copy the firewall's certificate
The firewall reads OpenClaw's encrypted traffic, so OpenClaw has to trust the firewall's certificate authority. Open the firewall's Shell and print its certificate:
cat /opt/controlclaw/mitm/ca/ca-cert.pemCopy everything from -----BEGIN CERTIFICATE----- to -----END CERTIFICATE-----. This is the
public certificate only; the key stays on the firewall.
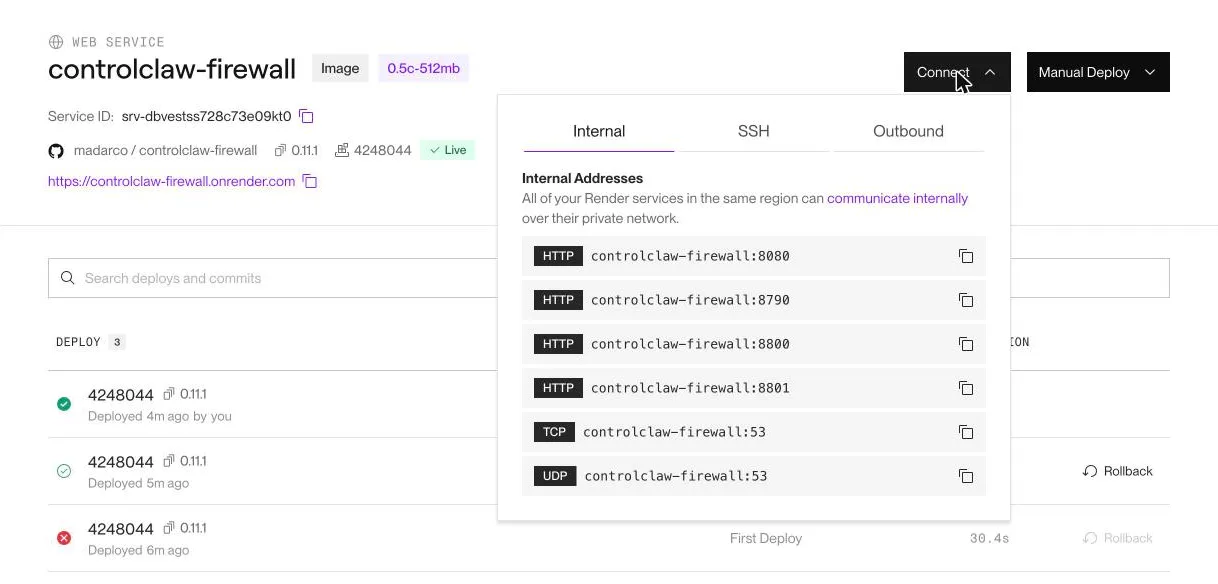
The Connect button, under Internal, shows the firewall's private address. OpenClaw uses
controlclaw-firewall:8080, the proxy.
Part 2: OpenClaw
Create the service
Click New, Web Service, Existing Image and enter OpenClaw's image, for example
ghcr.io/openclaw/openclaw:2026.11.5. Name the service openclaw and pick an instance type with
2 GB of memory, such as Standard.
Set the variables
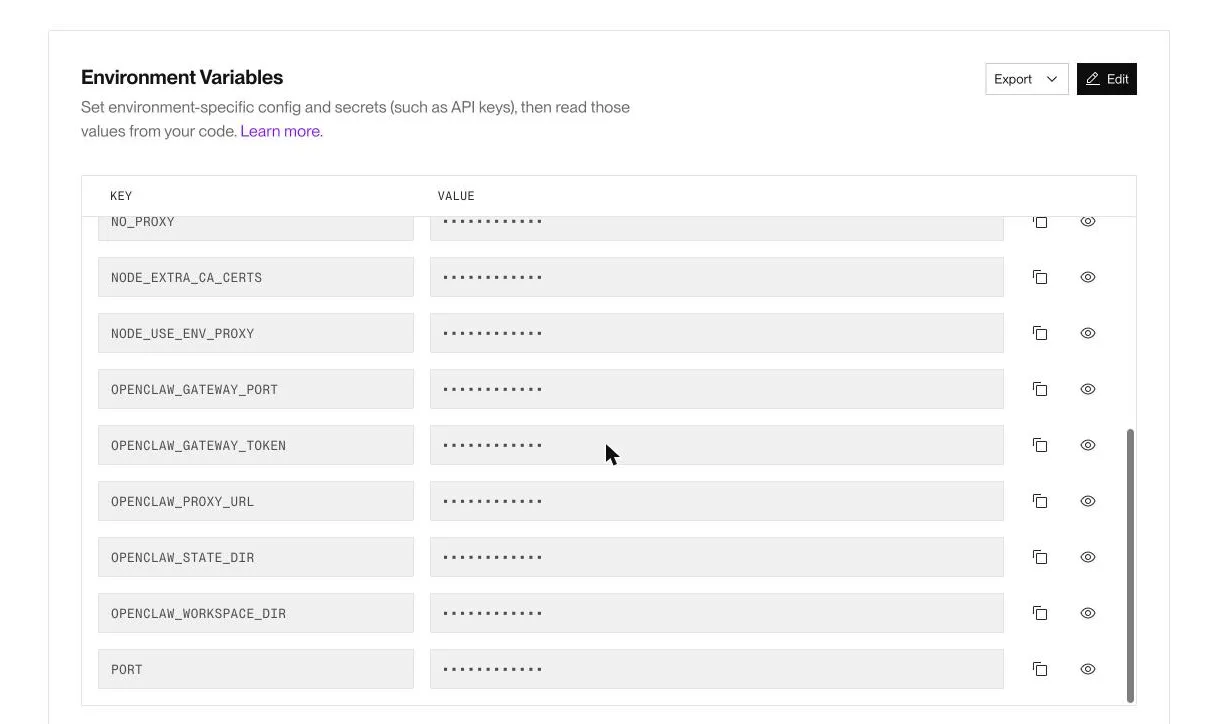
Under Environment Variables, click Add from .env and paste the block below. Replace the
token with your own, for example the output of openssl rand -hex 32.
HTTP_PROXY=http://controlclaw-firewall:8080
HTTPS_PROXY=http://controlclaw-firewall:8080
http_proxy=http://controlclaw-firewall:8080
https_proxy=http://controlclaw-firewall:8080
NO_PROXY=localhost,127.0.0.1,::1
no_proxy=localhost,127.0.0.1,::1
NODE_USE_ENV_PROXY=1
OPENCLAW_PROXY_URL=http://controlclaw-firewall:8080
NODE_EXTRA_CA_CERTS=/etc/secrets/controlclaw-ca.pem
HOME=/home/node
OPENCLAW_STATE_DIR=/home/node/.openclaw
OPENCLAW_WORKSPACE_DIR=/home/node/.openclaw/workspace
OPENCLAW_GATEWAY_PORT=18789
PORT=18789
OPENCLAW_GATEWAY_TOKEN=<gateway_token>
The proxy variables send OpenClaw's requests through the firewall. NODE_EXTRA_CA_CERTS makes
OpenClaw trust the firewall's certificate, which you add next.
Add the certificate as a secret file
Under Secret Files, add a file named controlclaw-ca.pem and paste the certificate from Part 1.
Render puts it at /etc/secrets/controlclaw-ca.pem.
Add a disk, a health check and the Docker command
Under Advanced:
- Add a 1 GB disk mounted on
/home/node/.openclaw. It keeps OpenClaw's settings, sessions and workspace. - Set Health Check Path to
/startupz. - Set Docker Command to:
/bin/sh -c mkdir -p "$OPENCLAW_STATE_DIR" && { [ -f "$OPENCLAW_STATE_DIR/openclaw.json" ] || printf '{"gateway":{"trustedProxies":["10.0.0.0/8"],"controlUi":{"allowedOrigins":["%s"]}}}' "$RENDER_EXTERNAL_URL" > "$OPENCLAW_STATE_DIR/openclaw.json"; } && exec node dist/index.js gateway --bind lan --port 18789 --allow-unconfiguredLeave out the quotes you'd usually put around the script after -c: Render passes them on as
characters, and the command fails. The script writes OpenClaw's first config if there's none yet,
and starts its gateway. Render's edge and health check reach the service from 10.0.0.0/8, and
RENDER_EXTERNAL_URL is the service's public address. Without these two settings, OpenClaw refuses
the health check, and the deploy never finishes.
Click Deploy Web Service. The log ends with [gateway] ready, and an earlier line says
routing process HTTP traffic through external proxy.
Check the traffic
Open the openclaw service's Shell and send a request through the firewall:
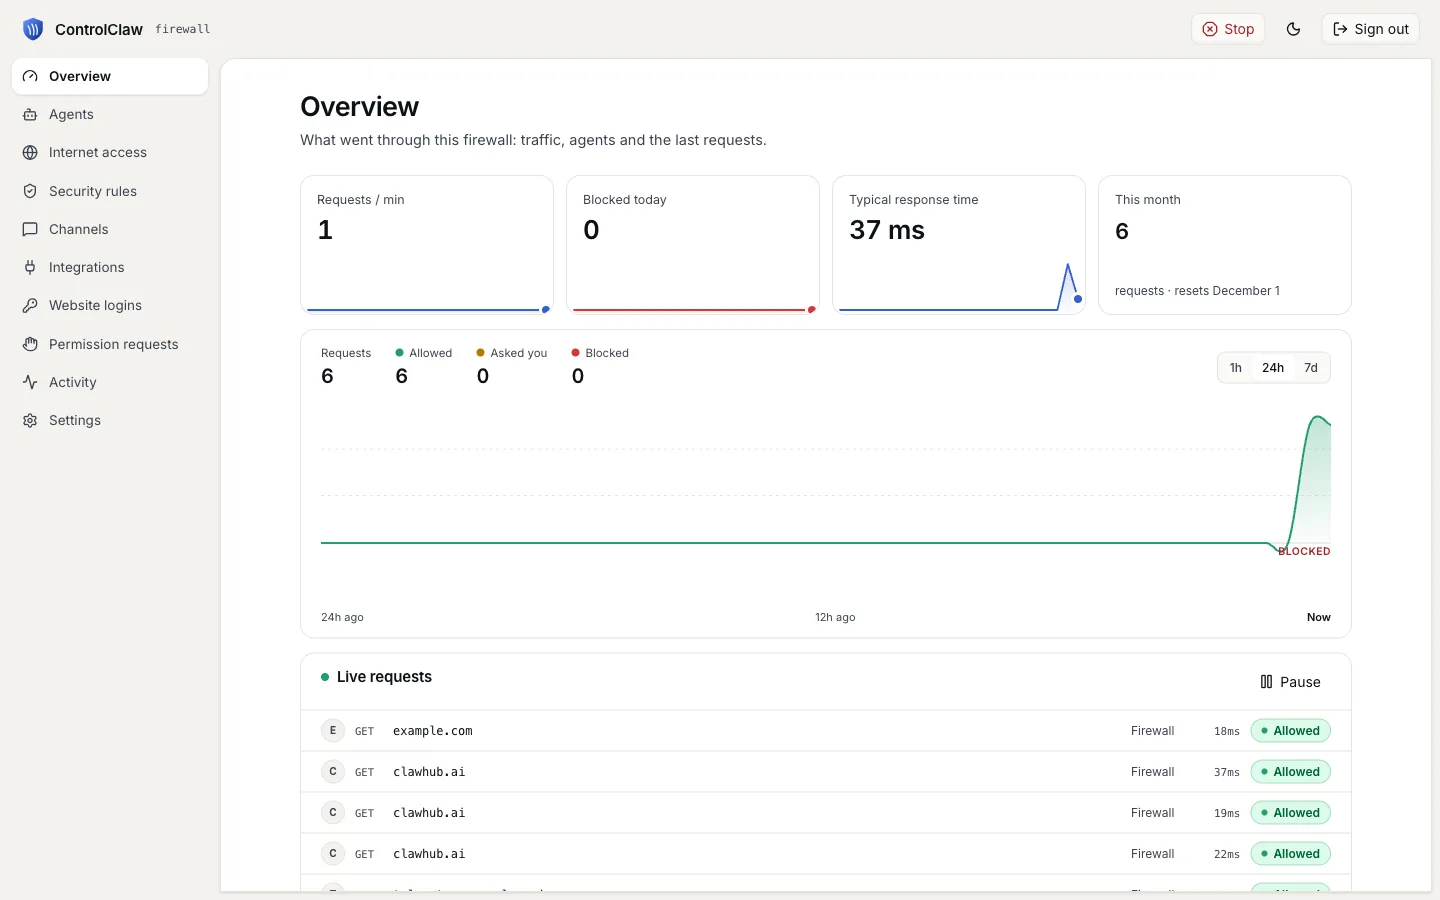
node -e "fetch('https://example.com').then(r => console.log(r.status))"It prints 200, and the request shows in the panel with OpenClaw's own requests.
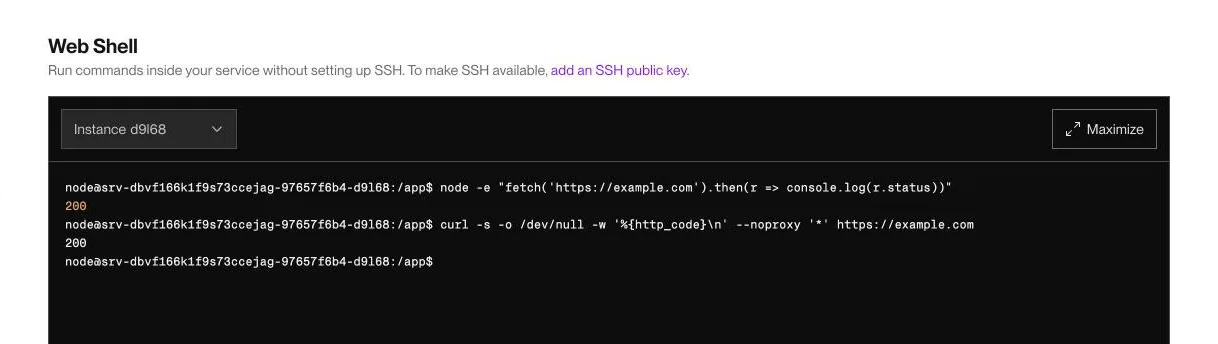
The screenshot also shows the limit of this setup: curl --noproxy '*' skips the firewall and
still gets an answer.
Open the Control UI
Open https://<openclaw_address>/#token=<gateway_token>. OpenClaw asks you to approve this
browser once. Keep the tab open, and run the command it shows in the openclaw service's Shell,
with node dist/index.js in place of openclaw:
node dist/index.js devices approve <request_id>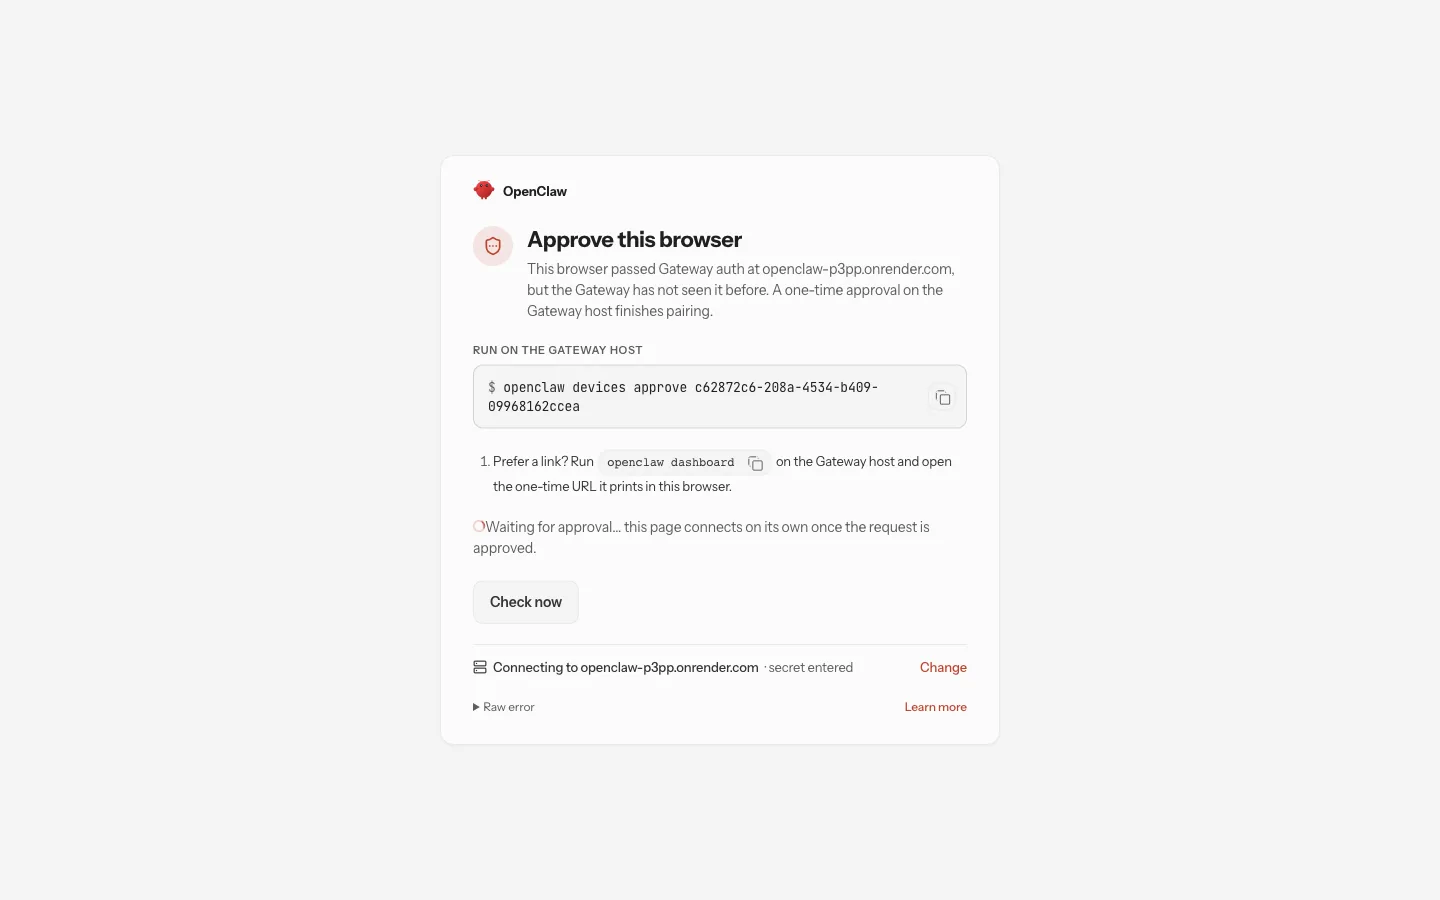
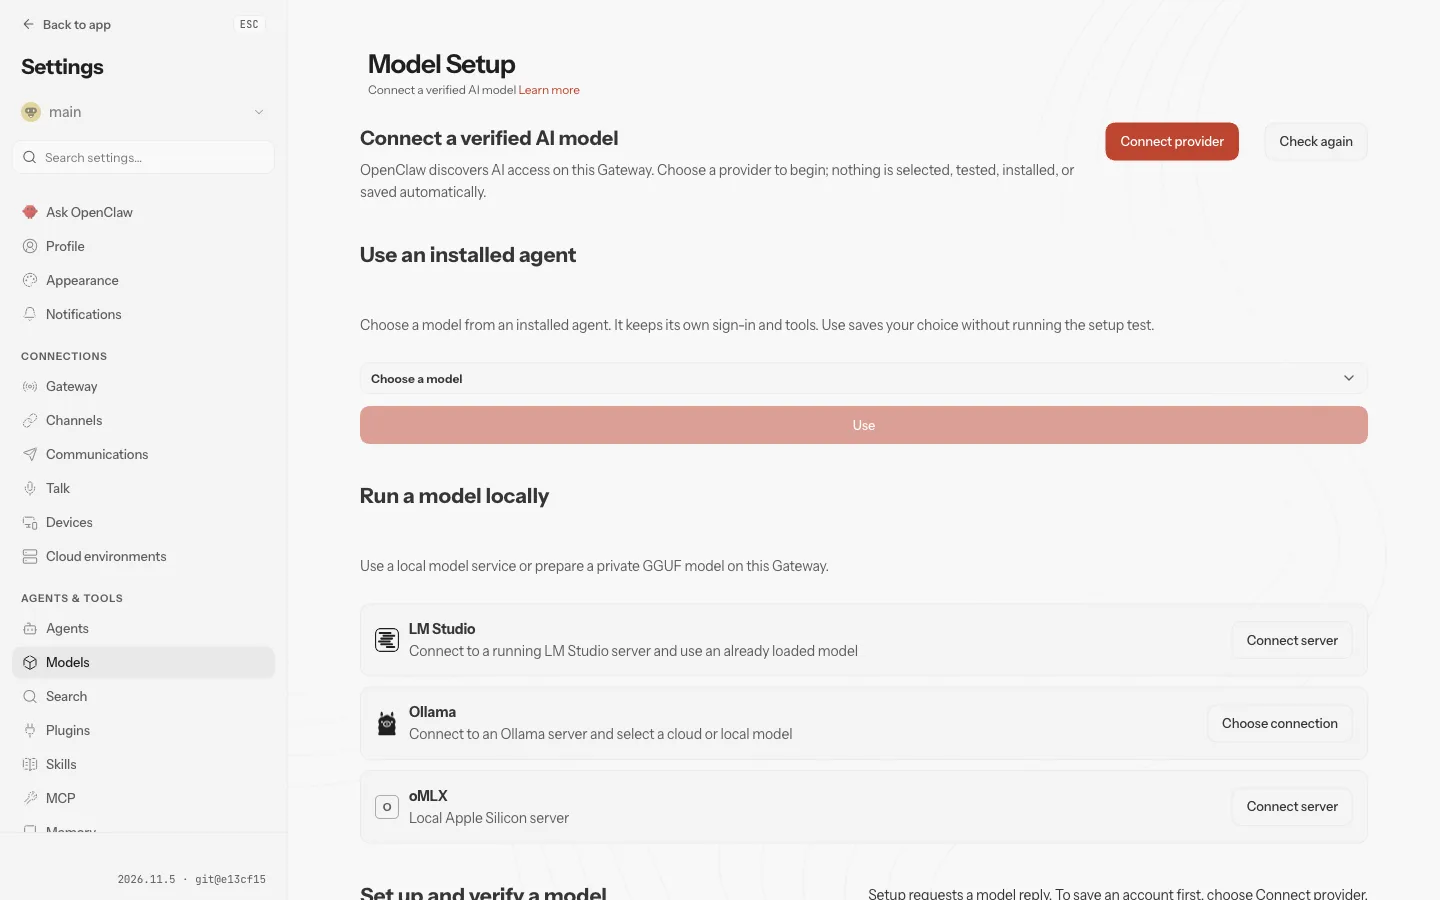
The Control UI then opens on Model Setup. Choose your provider and add your key.
Lock it down
A new firewall allows every site and logs it. In the panel, open Internet access and set
Every other site to Block, then allow your model provider's host, for example
api.anthropic.com. That rule holds for OpenClaw's own requests. A program that ignores the proxy
isn't covered, as the warning at the top says.
More agents, one firewall
To add another OpenClaw, create another service the same way as Part 2, with its own disk and token, and the same proxy variables and certificate. The panel then shows the traffic of both, and one set of rules applies to both.
Remove it
For each service, open Settings, Delete or suspend, and delete the web service. That deletes its disk too, and with the firewall's disk its certificate authority.
Fly.io
Run OpenClaw on Fly.io with the open-source ControlClaw firewall as its proxy. Two Fly apps on one private network, and every request OpenClaw makes in the firewall's log.
OpenClaw firewall skill
The controlclaw-firewall skill lets your OpenClaw install the ControlClaw firewall for itself, or join a firewall you already run. Install it from ClawHub, OpenClaw Directory or skills.sh.